# How to: Make A New Order
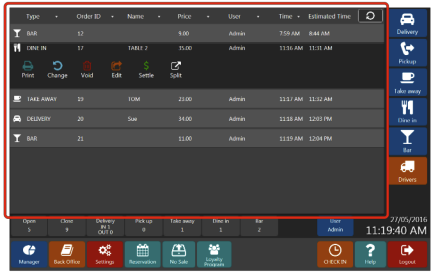
### Orders Screen
All open orders can be accessed in Orders Screen in red rectangle.
Orders Screen
Clicking on the order will open control panel where you can print receipt, change order type, void order, edit order (add more items), settle order or split order into two orders.
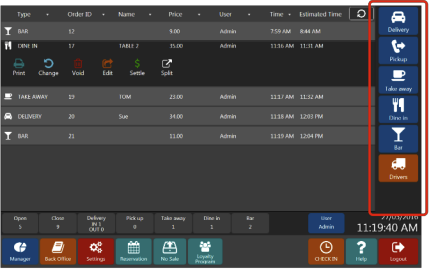
### Order Type Panel
To make new order start with order type. Click either on Delivery, Pickup, Take away, Dine in, Bar or whatever is applicable.\
\
Button Drivers will take you to Drivers Menu where you can add driver to order.
Order Type Panel
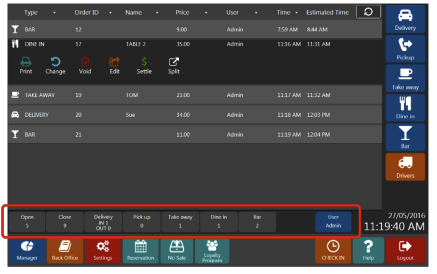
### Orders Screen Panel
You can filter your orders by order type, status or active user.
Orders Screen Panel
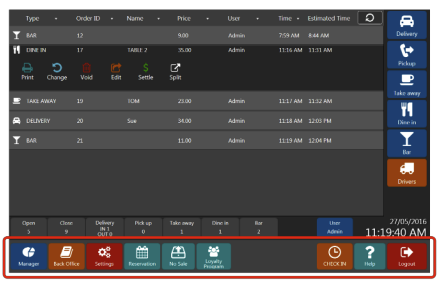
### Control Panel
Manager, Back Office, Settings and Reservation is visible only if you are logged in as a manager
Control Panel
### Steps on how to make a new order
1. On the Order Type Panel, choose type of order, for example Take away
Order Type Panel
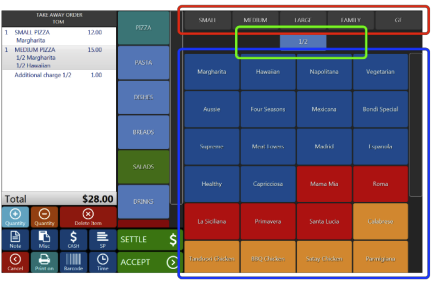
2. Choose from Menu Group panel, for example Pizza
Menu Group Panel
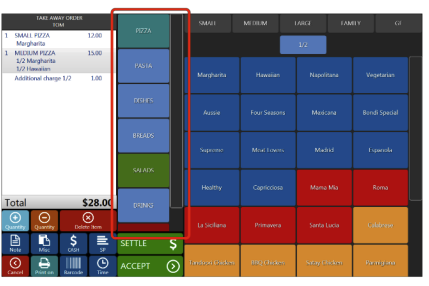
3. Go to the Item Panel\
\
Red rectangle : Menu Options Panel\
Green Rectangle : Split Menu Panel\
Blue Rectangle. : Menu Item Panel
Item Panel
Example: To order small Margharita press Pizza from Menu Group, Small from Menu Options and Margharita from Menu Item. After that the item will be added to the bill on lefthand side and you will be directed to the Modifiers Panel if selected item has active modifiers.
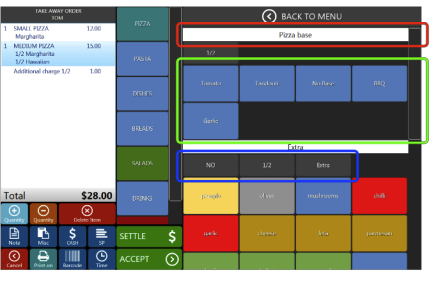
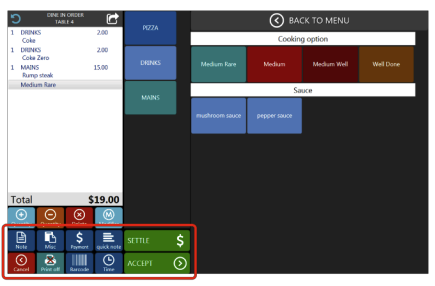
4. Modifiers Panel\
\
Red rectangle. : First Modifier Group Name \
Green rectangle : First Modifier Item Panel \
Blue rectangle. : Second Modifier Options Panel
Modifiers Panel
Example: If you don’t want olives on Large Supreme, after selecting the item press NO in second Modifier Option Panel and press olives in second Modifier Item Panel
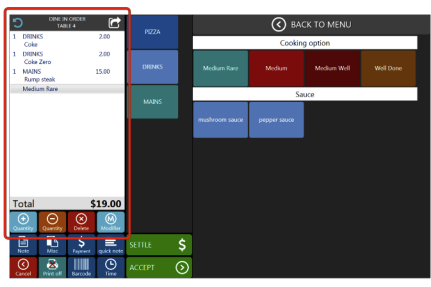
5. Ordered Items Screen\
\
Here you can see all ordered items and total amount that will appear on the bill.\
\
By pressing grey top heading you can change order type, customer name or table.\
\
You can also change quantity of highlighted items by pressing plus or minus, or delete item from the bill.
Ordered Item Screen
Modifier: You can manually add modifier to any item to the order. It will be printed on preparation printer with particular item.\
\
Delete button: Pressing this button will delete selected item. If you delete item from already accepted order the item will print on preparation printer as a deleted item
6. Clicking on Accept button on the Control Panel, accepts (saves) the order. It will also send particular items to preparation printer and print the receipt on receipt printer if the printer button is on.\
\
Pressing Settle button accepts the order and directs you to Settle Screen where you can Settle the order (receive payment and close the order) and apply discount. It will also send items to preparation printer.
Control Panel
Print button ON:  Receipt will be printed on receipt printer after Accept or Settle \
\ Print button OFF:  Receipt will not be printed on receipt printer after Accept or Settle
Note: You can write a note that will be printed only on preparation printer. If you have more than one preparation printer it will be printed on all of them
Misc: You can add Miscellaneous items that you don’t have in the menu. It can be with or without price. Every Miscellaneous item will be printed on all preparation printers\
\ Payment: You can pre select form of payment before going to Settle Screen\
\ Quick Note: Pre-set notes that will be printed on particular preparation printer. To pre-set quick notes go to Back Office/Settings/Quick Notes\
\ Barcode: You can manually type item barcode without scanning it\
\ Time: There are pre-set times for different order types that can be changed in settings menu or you can manually change it for particular order by pressing Time button
{% hint style="info" %}
Get started at
{% endhint %}